This is the second blog in our three-part series focused on teaching you the best practices for building an overlanding vehicle. In Part 1, we covered the basics: Determining needs and wants, the difference between a dedicated overlanding build and a daily driver, selecting a platform (mid-sized or full-sized/pickup or SUV), and brand choice. In Part 2, we will be covering tire selection, suspension setup, and body armor. Let’s dive in and get going!
WHAT IS THE BEST TIRE FOR AN OVERLANDING VEHICLE?
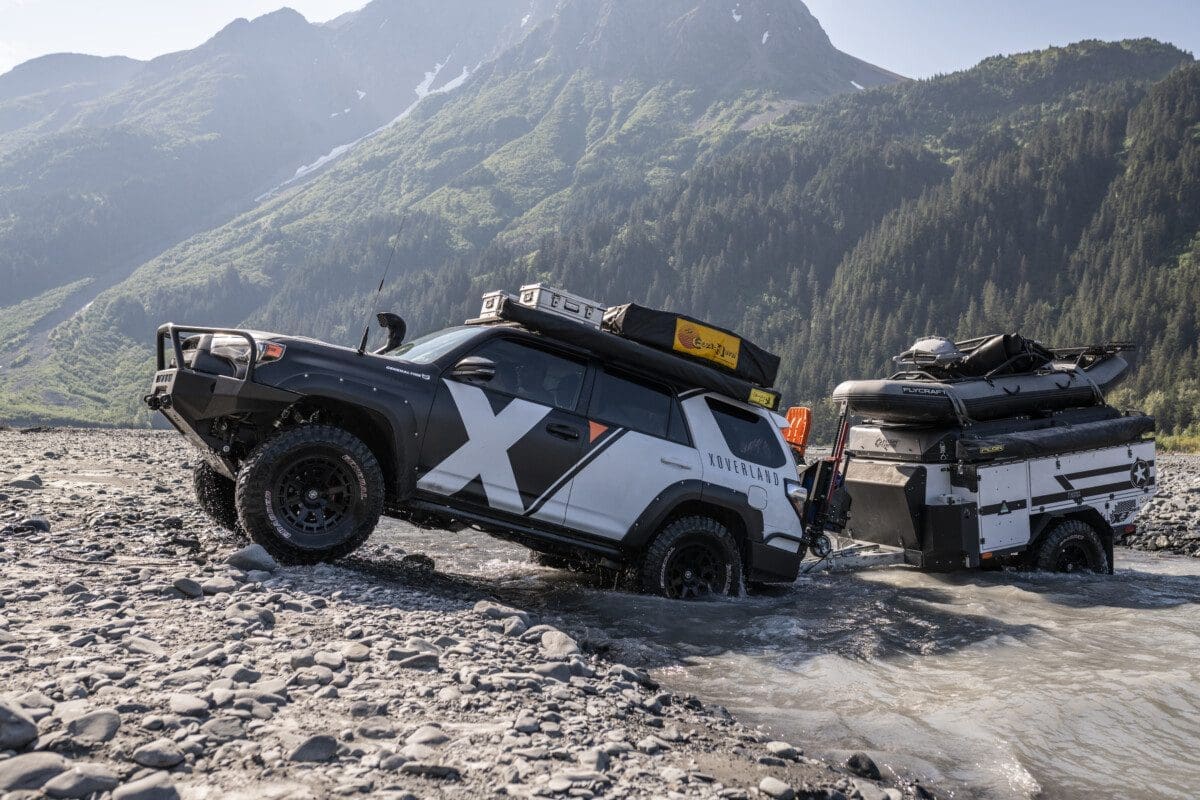
What is the best tire for an overlanding vehicle? That depends on many factors–all of which need to be carefully considered. General Tires have performed amazingly well for us, with only three recorded flats on all of our expeditions.
All-Terrain or Mud-Terrain? 33’s, 35’s, or 37’s? How many spare tires do I need for my overlanding vehicle? These are all garden-variety questions when it comes to this critical step in building your overlanding vehicle: Tire selection.
Like all aspects of your overland vehicle build, tire selection requires knowledge of facts along with an awareness of the advantages and disadvantages of different available options. Making the right choice in tire selection for your overlanding vehicle also demands an honest assessment of your needs and careful critical thinking as you weigh your choices.
While OEMs (“Original Equipment Manufacturing”) often offer an optional off-road package of some kind that will feature enhanced tires, suspension, and skid plates, for the serious overlander, these packages are often inadequate or not intended for overlanding use. Therefore, the course of action for most is to make additional upgrades to these critical areas of the build after purchasing the vehicle. Tires are arguably the easiest win here, and many dealers will often offer to give you a trade value of some kind on the vehicle’s stock tires and swap them out with an upgraded option.
Tires are arguably the easiest win here, and many dealers will often offer to give you a trade value of some kind on the vehicle’s stock tires and swap them out with an upgraded option.
So what does your tire upgrade look like? That depends on a variety of factors which you’ll need to consider carefully. For starters, you can simply stay with the stock tire size and change the manufacturer, tread type, and ply. For example, if the stock tire size is a 31″ tire but it is only a 6-ply featuring an all-terrain tread and you’d rather have a 10-ply mud-terrain, stay with the same tire size and change the tire type to something that matches those parameters. Doing so is an easy win for an upgrade that will provide enhanced puncture resistance if you’re carrying heavy payloads and improved traction if you plan on frequently driving in muddy terrain.
By staying with the stock tire size, your vehicle will handle exactly as it is intended to per factory specs. When you consider the level of engineering that goes into most new vehicles today, this fact is definitely worth bearing in mind.
If there’s a truck build in your future, check out this SNEAK PEEK episode of Zero to Hero on YouTube.

PROS AND CONS OF INCREASING YOUR TIRE SIZE
When it comes to tire size, many prefer a larger tire that gives a vehicle a bolder, more masculine feel and aesthetically balances out those large empty spaces inside the wheel-wells of most pickups and SUVs. To be sure, beyond the subjective world of aesthetics, there are some sizable advantages to a larger tire:
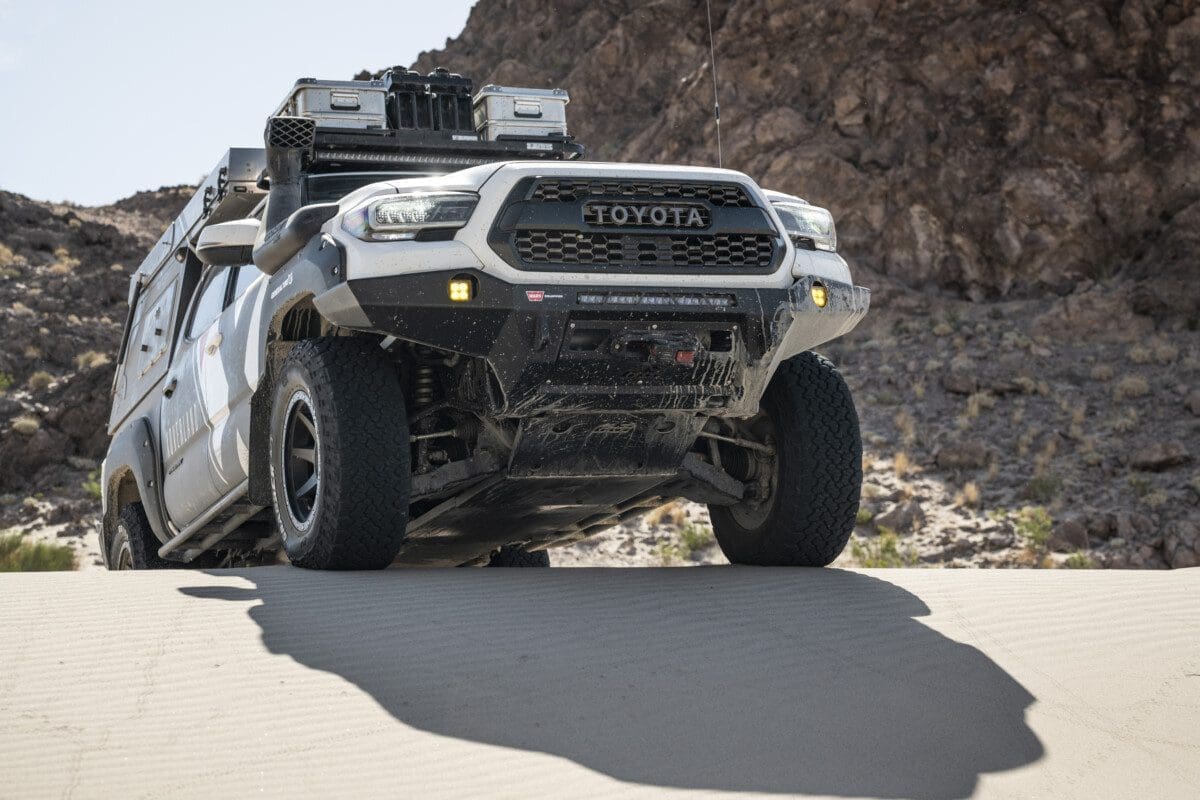
- Increased Ground Clearance: The most common way to increase a vehicle’s ground clearance is to increase the tire size. Increased ground clearance offers an advantage on trails by keeping the vehicle above rocks and debris and improving the vehicle’s approach, departure, and breakover angles.
- Improved Flotation: When driving on soft surfaces such as sand, mud, and deep snow, once the air pressure is reduced to off-road levels, larger tires provide increased floatation over their smaller counterparts, performing like a kind of snowshoe for your vehicle.
- A Softer Ride: When driving on rocky surfaces and on rutted, potholed, rocky roads for long distances, decreasing the air pressure of a larger tire allows the tire to function as a cushion for your vehicle, its occupants, and its equipment. We have found this aspect of larger tires a real advantage on our expeditions where keeping sensitive electronic camera gear safe from damage and our film crew comfortable is essential.
These advantages noted, it is now time to consider some of the downsides of increasing the tire size of your overlanding vehicle:
- Intended Purpose: Overland vehicles are, ostensibly, built for overlanding and not rock crawling and hardcore four-wheeling. Overlanding often requires traveling for thousands of miles on a wide variety of road surfaces in remote areas and in less developed countries where vehicle sympathy is critical. Larger tires decrease fuel economy and are often difficult to find in less-developed countries, making replacement a challenge. In order to allow for improved fuel economy and performance in a variety of terrain (including long stretches of pavement) you may want to go with stock tire sizes or only slightly larger and limit your exposure to severe terrain where larger tires would be a necessity.
- The Need for Re-gearing: Large tires are heavy and take much more power to propel. To optimize the engine’s ability to handle this larger load, it may be necessary to re-gear your vehicle with aftermarket gearing. This modification is expensive and these gears may not last as long as their OEM counterparts matched to stock tires.
- Fitment Issues: If you decide to outfit your overlanding vehicle with significantly larger tires, fitment to the stock body frame could become an issue. To solve the fitment issue, you may need to cut the body panels of your vehicle as well as add some kind of a lift kit and/or wheel spacers to your chassis.
- Placement of the Full-Sized Spare: If you increase the tire size of your vehicle, you must remember to do the same to your spare/s. A larger spare tire often will not fit in the normal area set aside for the spare by the OEM, making some kind of an aftermarket spare-tire carrier a necessity.
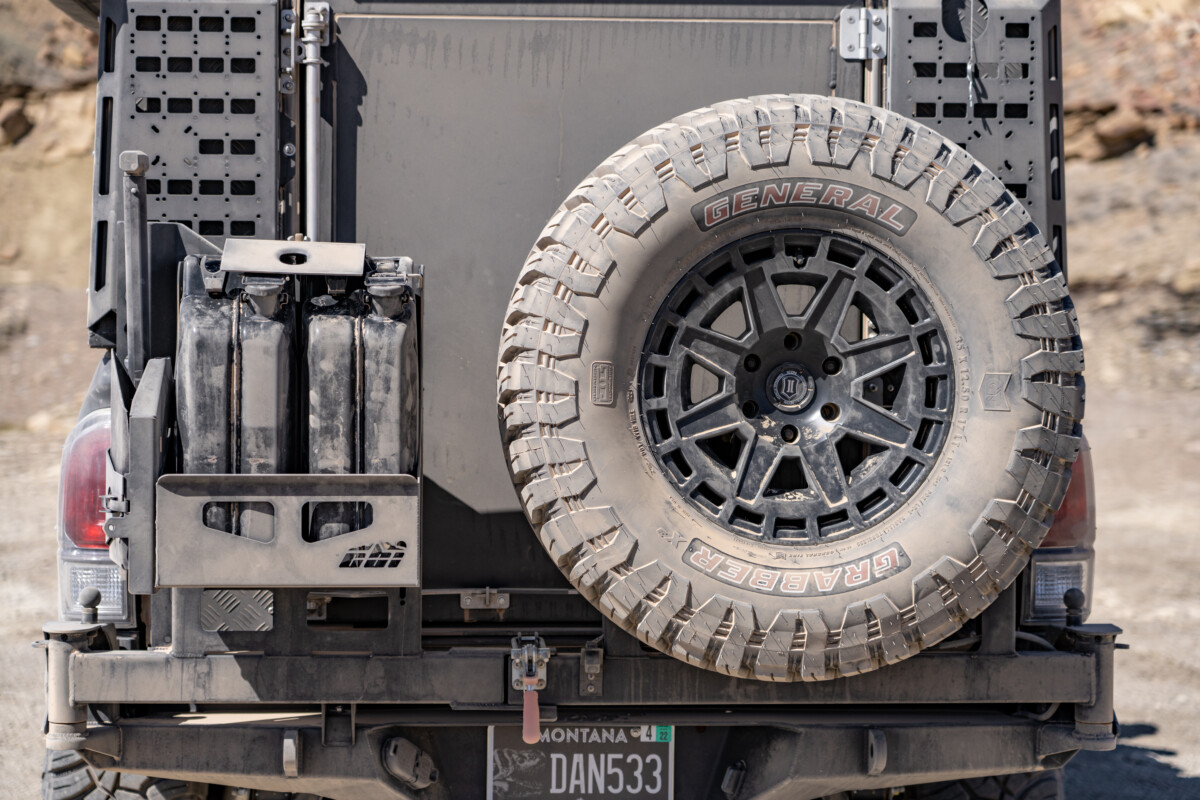
If you decide to go with larger tires for your overlanding vehicle, where will you put your spare? CBI Offroad Fab offers a great solution with their rear swing arm bumpers.
In summation, there are real advantages to increasing the tire size of your overlanding vehicle, but just be aware of the path you are heading down once you make the decision to significantly increase your tire size and be sure this decision is the right fit for you.
CHOOSING THE RIGHT SUSPENSION SETUP FOR YOUR OVERLANDING VEHICLE
X3 Meridian cresting a dune in Baja.
The reason we have chosen to discuss suspension after tire selection is because your suspension needs are directly influenced by your tire choice. If you choose to stay with a stock tire size, then whether or not you decide to upgrade your suspension will be related to the demands placed upon your vehicle that come as the result of the increased weight added by body armor, roof racks, and sleeping/camping systems.
Increased tire size usually requires the need to “lift” the frame of the vehicle to accommodate the larger tire size. The best way to do this is by means of suspension rather than by simply adding blocks.
When it comes to added vehicle weight, the stock suspension of a vehicle is generally designed to handle the stock weight of the vehicle. By adding skid plates, heavy-duty front and rear roof racks, winches, larger fuel tanks, along with sleeping systems such as rooftop tents or slide-in or bolt-on camper systems, we increase the weight (often dramatically) of our vehicles, making stock suspension inadequate. To keep the vehicle safe, comfortable, and performing to levels close or equal to OEM specifications, a well-thought-out suspension upgrade is essential.
By adding skid plates, heavy-duty front and rear roof racks, winches, larger fuel tanks, along with sleeping systems such as rooftop tents or slide-in or bolt-on camper systems, we increase the weight (often dramatically) of our vehicles, making stock suspension inadequate.
It also should be noted here that the vehicle’s braking system should always be upgraded to handle the increased weight of the vehicle that has come as the result of numerous modifications. The braking system of a vehicle is designed only to handle stock specifications; go beyond your stock G.V.W.R. (Gross Vehicle Weight Rating) and you will need to upgrade your braking system to maintain safe handling characteristics and vehicle performance. At X Overland, we rely on Power Brakes to ensure we have the performance we need out of our overlanding builds. (Believe us. It is terrifying to be on the edge of a steep cliff when you find your vehicle unable to come to a complete stop under its heavy load!)
Here are some popular and effective approaches to addressing your increased suspension needs as you fully build-out and equip your overlanding vehicle:
- Airbags: Airbags are a cost-effective and simple way to level out your vehicle under a heavy payload. They will prevent “sagging” and provide a more stable ride, but they are only a starting point to a more comprehensive suspension system that will allow the vehicle to perform well in a wide variety of terrain under a heavier load.
- Uprated (Heavy Duty) Coil and/or Leaf Springs: There are many companies that supply uprated (heavy duty) additional leaf springs and/or coil springs. Make sure to work with a quality provider and do your math carefully in order to get a set that is right for the GVW and Payload of your specific vehicle. Don’t skimp or get lazy with your research here! Find a nearby weigh scale you can use and do the math. You need to get these figures correct or your new coil/leaf springs will likely be the wrong size and your money and effort will be for naught.
- Improved Shock Absorbers with Increased Damping and Rebounding Capacity: Once you have determined the numbers you’re working with (weights) and added the appropriately rated springs, select the shocks you need to match the spring rate and you’ll be set. We recommend working with a top manufacturer to get your suspension system dialed in correctly. Doing so will save you both time and money and ensure your vehicle’s performance is optimized.
Choosing the right suspension system for your overlanding vehicle can be a tricky business. We recommend enlisting the assistance of experts. For all of our suspension needs at Xoverland, we use Icon Vehicle Dynamics.
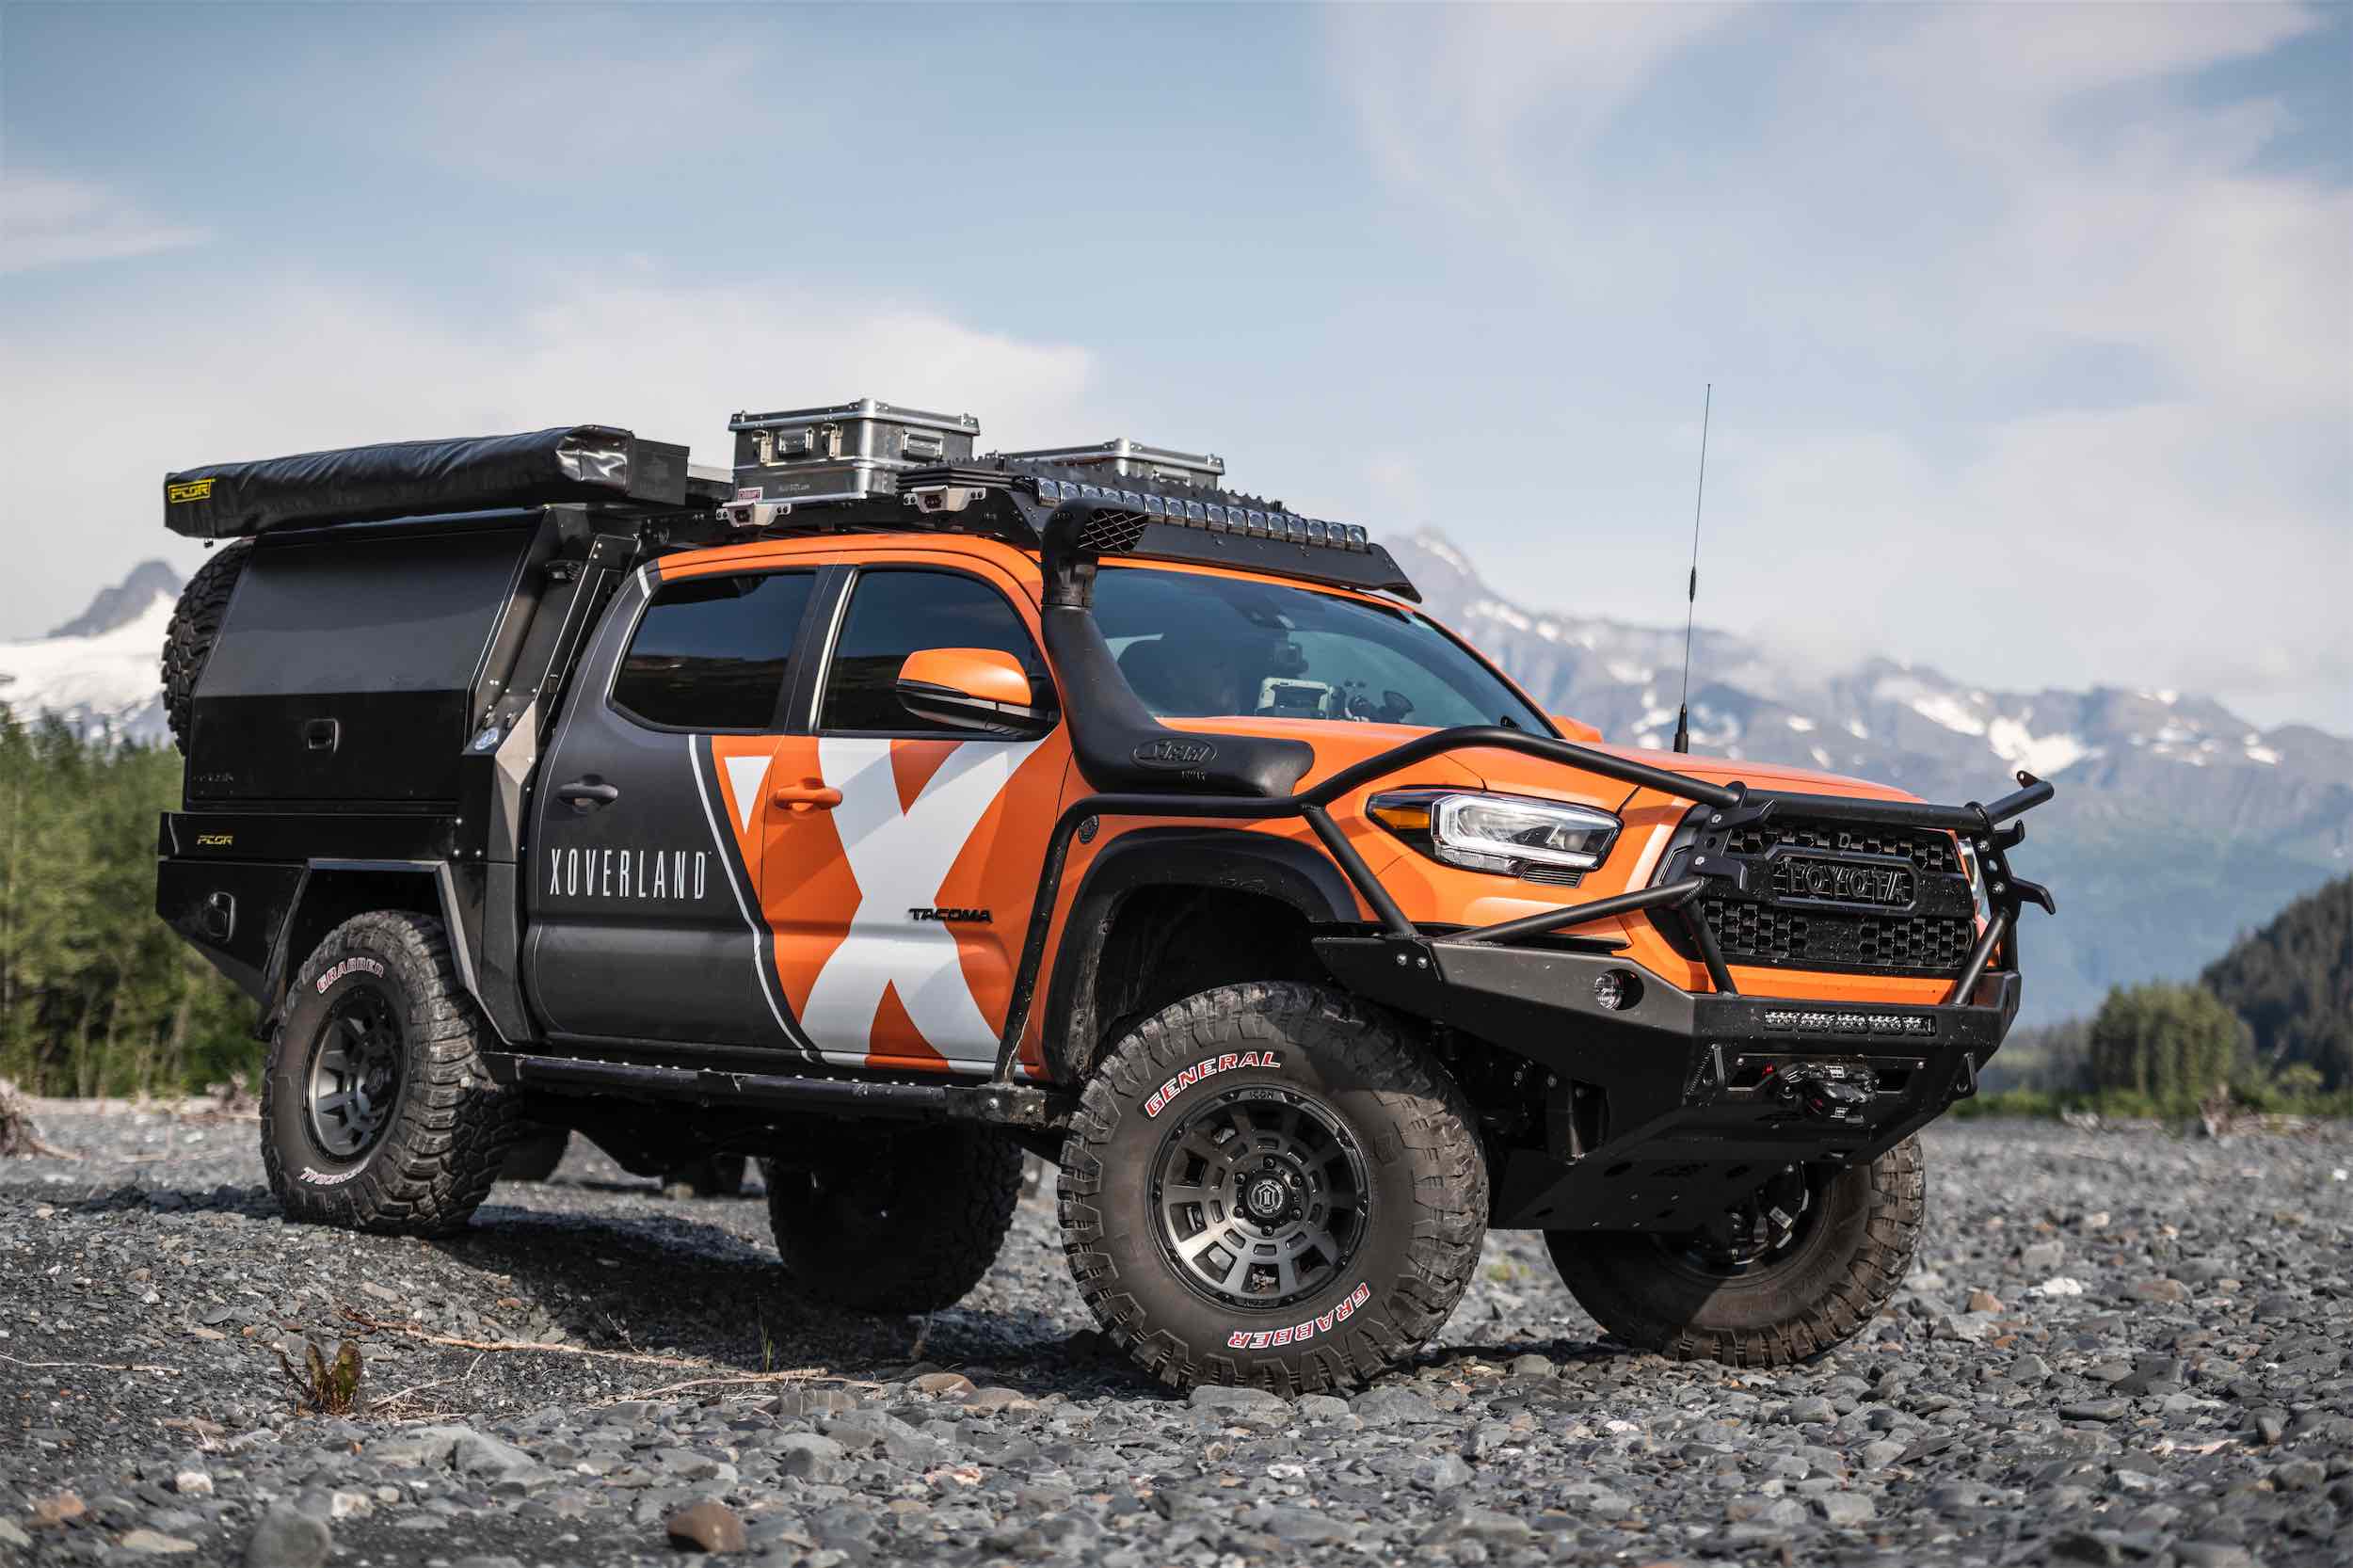
SELECTING BODY ARMOR FOR YOUR OVERLANDING VEHICLE: SKID PLATES, BUMPERS, AND ROCK SLIDERS
Like selecting the right tire size, selecting body armor for your overlanding vehicle involves a variety of factors that need to be carefully thought through before addressing this part of your build. The fundamental questions you need to ask yourself at the start of this process are as follows:
- In what kind of terrain will you be doing most of your driving? Will most of your miles be highway and dirt/gravel roads with only occasional forays into extremely rocky terrain or will you be rock-crawling every weekend with your buddies and only occasionally going on an overland trip?
- Will you be needing a winch often or not at all?
- Do you need more room for larger tires, including a place to put your spare?
- Would you like an increased angle of approach and departure?
- Would you like protection from animal strikes (deer, kangaroos, etc.)?
Let’s look at why these questions matter. If you do a lot of weekend rock-crawling or four-wheel-drive touring in a place like Utah, then a full set of steel skid plates may be the best option as they will protect the vital components of your vehicle from numerous hits over many years of wheeling. However, if you are planning an overlanding trip from Prudhoe Bay to Ushuaia with only occasional detours down two-track trails then a lightweight set of aluminum skid plates might be all you need.
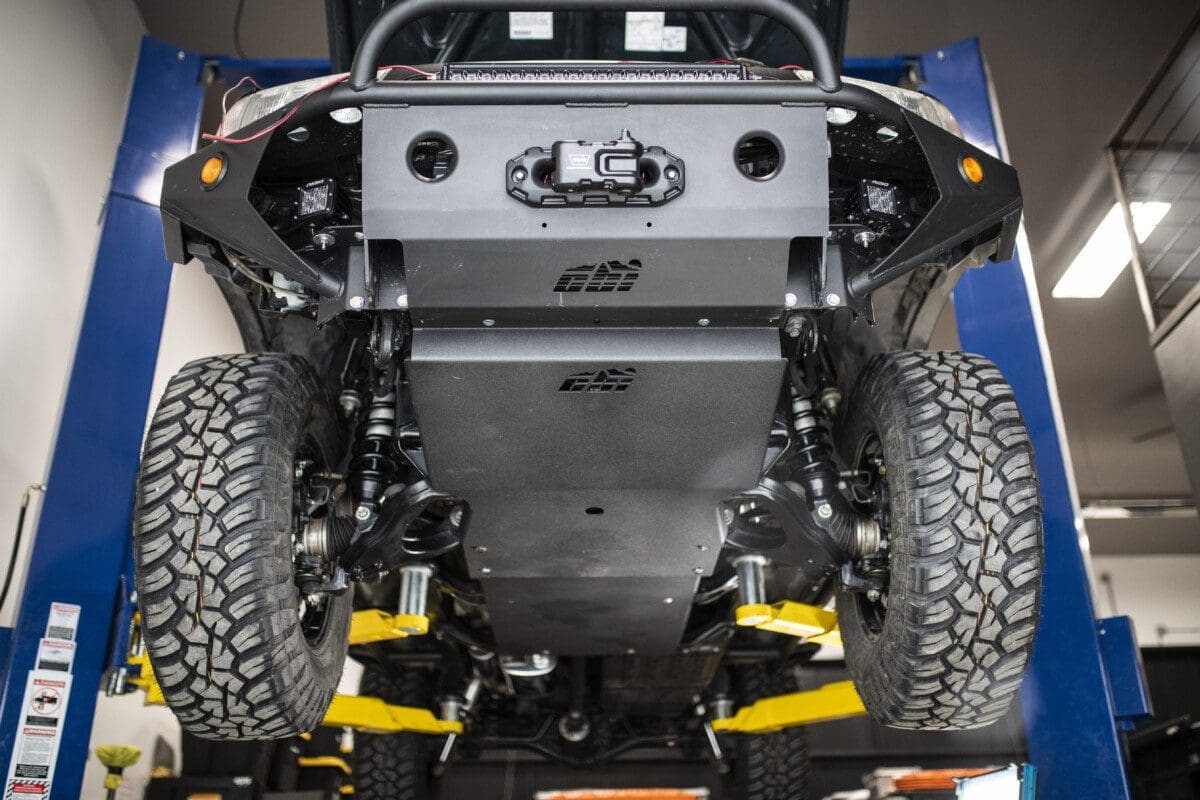
The right set of skid plates do a remarkable job of protecting the vital undercarriage of a vehicle, but so much armor can also have drawbacks. For our needs, we have largely gone with aluminum skid plates courtesy of CBI Offroad Fab.
Front and rear bumpers offer lots of advantages to an overlanding vehicle. For starters, many front and rear bumpers allow for a location to insert a winch along with solid recovery points for getting unstuck, and jacking points for lifting the vehicle.
Depending upon design, front bumpers can also offer significant protection from collision with animals such as deer and kangaroo. It only takes one high-speed animal strike to take out your radiator and leave you stranded in a remote area in the middle of the night. Plus, the cost of repairing the front end of your vehicle with OEM parts will far outweigh the cost of a heavy-duty front bumper you could have purchased to prevent the damage in the first place.
It only takes one high-speed animal strike to take out your radiator and leave you stranded in a remote area in the middle of the night.
Rear bumpers typically offer a system for carrying spare tires, jerry can attachments for additional fuel and water, and space for Maxtrax, shovels, jacks, and external trash carriage. Both front and rear bumpers usually improve approach and departure angles and are offered in either aluminum or steel. Again, consider your needs and the additional weight of steel over aluminum before making your selection.
HOW TO BUILD YOUR OVERLANDING VEHICLE PART 2 – CONCLUSION
Now you have chosen a platform and addressed the areas of tires, suspension, and body armor for your overlanding build. In Part 3 of this series, we will explore overland lifestyle approaches via sleeping/camping systems along with related gear and equipment such as fridges and water storage units. With all aspects of your overland build, remember to take your time, do your due diligence, and most importantly, enjoy the journey!
For more information about our vehicle builds, check out our Vehicle Build Page!
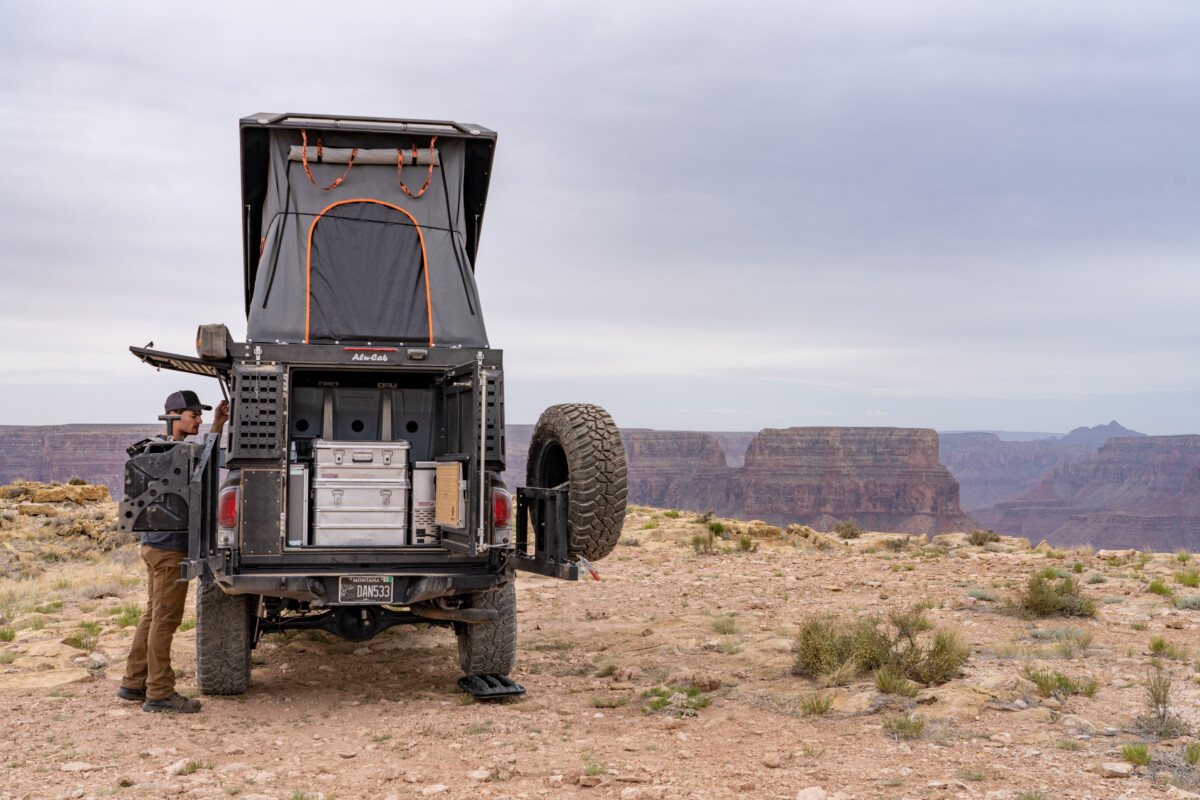
The task of building an overlanding vehicle is a journey in itself, but the rewards are worth it, as lead X Overland film editor, Brendan Boss, found out while filming an episode of our new Out and About series in Utah recently. Pictured here: Alu-Cab Canopy Camper